today i installed my piece (affectionately titled 'the security envelope project') at the ontario crafts council for the diwhy? exhibition that opens tomorrow. as a result, i will show you how i did it in case you ever get the urge to display 289 1" buttons on a wall somewhere. oh yes, i should apologize for the photos in advance. the lighting was not great and my photography skills have some holes in them so they are petty grainy.
step #1 - do math
i did this in my head and thus couldn't take pictures. in this case, the buttons'centres will be spaced 1.5 inches apart (leaving .5 inches between each button) and will be arranged in a grid of 17 squared (the highest square number i could muster out of my current collection).
step #2 - make a centre dot on the wall.
step #3 - apply a horizontal piece of masking tape over this dot, extending the width of your intended display. this part can be eyeballed. the level will come in later.
step #4 - measure out a leveled series of dots (at your predetermined intervals and quantity).
step #5 - place a new piece of masking tape vertically using the centre dot as a guide.
sep #6 - repeat step #4 on the vertical axis.
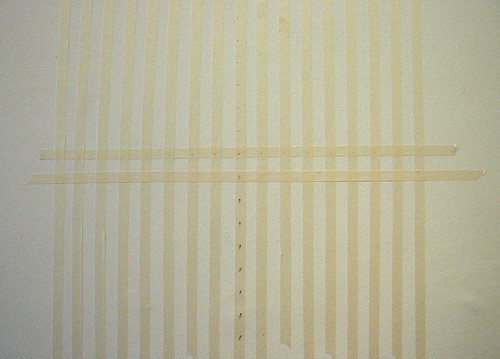
step #7 - start applying lines of tape (eyeballing their levelness), using this centre axis as a guide. part way through, your grid should look like the one above. when you are finished this step, it should look like this:
step #8 - draw levelled lines through your central axis of dots. this should be done with some amount of care.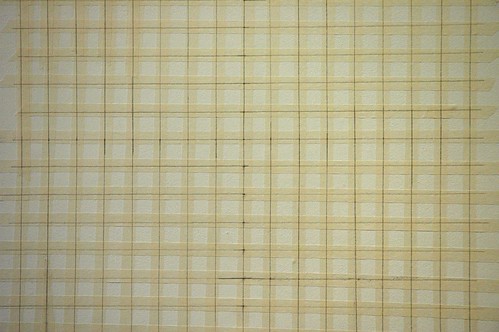

...see how my eyeball lines and leveled lines vary considerably? i even had to add tape in a few places so as not to draw on the wall (which i was trying to avoid).
step # 9 - nails!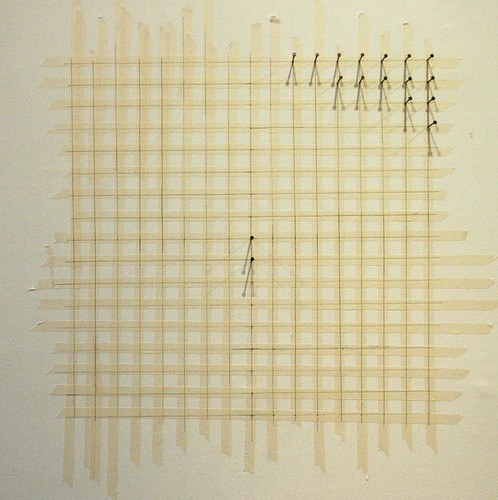
i used 2 inch common nails with a nice flat head. although i started by placing two in the middle, i quickly realized that right-handed people should start in the upper right corner. i would imagine that the reverse is true for lefties but have yet to test this theory.
step #10 - keep it up! don't loose focus and just go for a coffee/tea.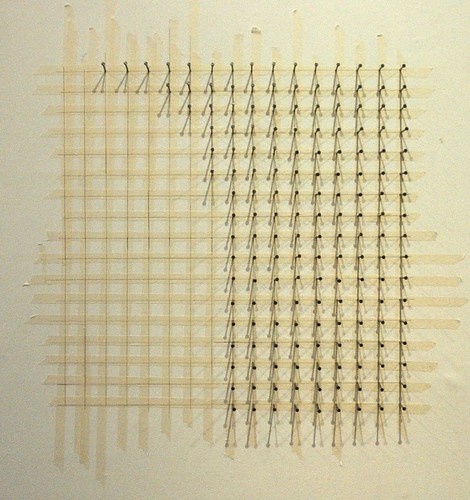
step # 11 - finish nailing and feel a warm sense of accomplishment. after all, this is the most stressful part of the process. if you mess up, you risk making the holes loose and having your nails fall out. i am very proud to report that i hammered in 289 nails without bending one, loosening a hole (well, that's debatable), or hitting a finger. my dad would have been so proud.
step #12 - remove tape. i find that this process is greatly aided by having shannon gerard idling in the vicinity. if you are lucky enough to find yourself in this situation, you will see how much faster she is than you at picking masking tape off a wall.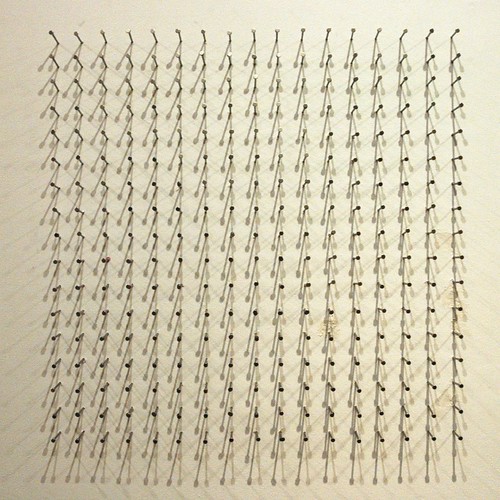
this is also a good time to start marvelling at the shadows that a big grid of nails casts.
step #13 - apply a single magnet to the end of each nail. i chose the rare earth magnets at a diameter of 1/16 of an inch. these magically fit the nail heads perfectly with no math or effort on my part. when applying magnets to the nail heads, you will also notice that shannon is faster than you.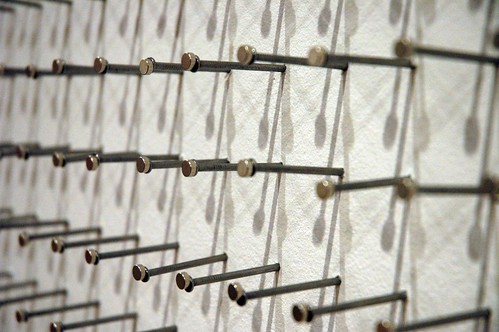
step #14 - apply your 1" buttons to the magnets. i found that you have a better chance of getting them close to centered if you open the pinbacks. i did not take any pictures of this step because i could not bear the resulting images given the low light. but fear not, i will be back tomorrow and will take some pictures when the sun is shining.
step #15 - be proud of your accomplishment. you actually did something today!
reflections:
- gallery walls are full of patched holes. you should have spackle and paint on hand to deal with the chips and cracks your nails will create.
- tape is hard to peel off walls. i actually may have to think of a better system for future installations, but this was a first stab and worked out exceptionally well.
- accept the irregularities of doing it by hand. it is nearly impossible (for me) to make this grid all sit on the exact same plane. also, there are so many layers of variable (measuring, nailing precision, magnetism, button/pinback cooperation...) that inconsistencies are bound to present themselves. i have decided that these elements make the piece more organic. besides, a show about the diy movement can't possibly want to install the craziness like an automaton, right? like what is this...readymade?
thanks for reading (if you did). is anyone else actually going to try to do this somewhere? let me know, if you are. i am thinking of selling do-it-yourself kits in my etsy shop (of various grid dimensions) but i am holding off until i have perfected the instructions. please let me know what you think of that idea, too.
and go to the show! it opens tomorrow with a reception on february 5th.
Monday, January 19, 2009
putting 289 buttons on 289 nails (or how to drive yourself crazy in four easy hours).
Subscribe to:
Post Comments (Atom)

15 comments:
Next time, try using a big sheet of brown paper. You can draw your grid before you hang it on the wall, then just tape it to the wall and nail, or better yet use drywall screws and a cordless drill - way easier than nailing something!
Good work! Wish I could go to the show.
Kathleen has a great non-tape solution, but if you do have to (temporarily) use tape on walls in the future, I recommend painter's tape (that blue or green stuff people use to keep their baseboards clean when they paint). It comes off very easily.
Ahh. Someone beat me to the blue tape idea.
But hey, isn't it possible that somewhere out there someone makes giant sheets of graph paper? I mean, it's possible that it would work with the buttons you have if they do. And if they don't...then what about that brown paper idea but with the huge sheets of lined paper they use to teach first graders how to write. Then you just have to add vertical lines!
Looks wonderful!
I can't wait to see the buttons hung with care. Magnets are a marvelous idea. I agree with Kathleen, I would use screws, though the pictures would not look as timeless.
Well done.
Can you come do that at our house?
yes, paper is the future fix i have planned. tape in general was a bad idea and would be an even worse idea if the nails were any closer or my hands were any bigger. but such is the process of planning in times of personal crisis. the obvious just doesn't present itself.
as for screws, i don't think they would look the way i want. as it is, these nails stick out about 1.5 inches from the wall so they are very present in the look and feel.
thanks for all of your care and input, guys! i live and learn. i am just happy i got the thing out of my head and onto a wall.
and church of craft athens - sure. when shall we make a ate to do it? i also got the package from you and am late in thanking you. it's amazing!
wow! I just saw the photos in your flickr, it looks amazing! its just so exciting that your piece is a collection of litle things coming from many many places
and wow, when you see thing in the galleries you never think how hard is to get them displayed all neatly haha
congratulations!!
i might be a faster tape remover than you, but you are have more overall attractiveness and WAY bigger tits.
plus, you are awesome.
yes-- you are have.
what i are have it actual tits, you more than are make up for in boob quantity.
you guys.
That looks insanely awesome.
i made a typo up there which makes my message even more hilarious.
Looks incredibly amazing.
And someday, technology will enable us to take photographs of the math in your head thus completing the step-by-step guide.
I know I have seen big 3M post-it pads like they use at meetings that are graph paper. Although I imagine the spacing would be a little tight.
Post a Comment